Book Re-Cover: The Silmarillion 1
So! I got another chance to do another book re-cover! Requested this time is Tolkien's, The Silmarillion. If i haven't mentioned it before, every time I have a custom book order it is always a constant back and forth messaging in order to create the design of the new piece. After this was done it was time to get working!
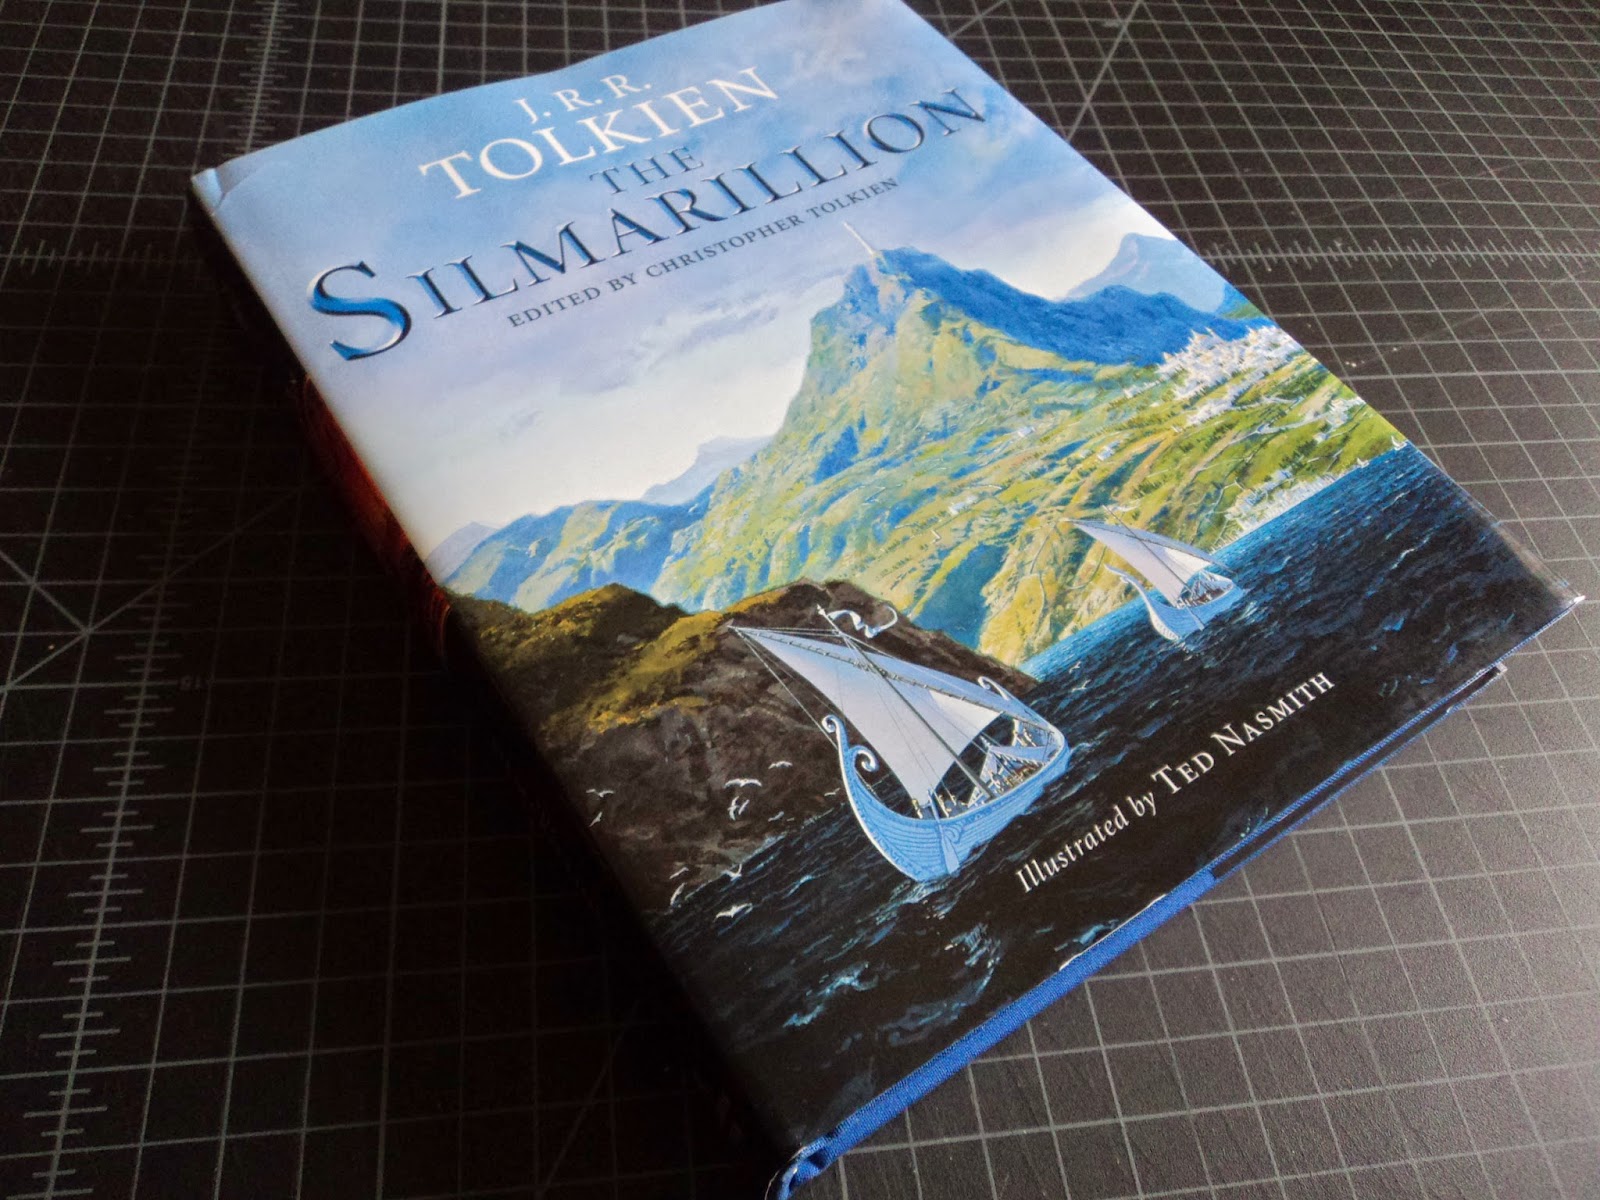 Started off by getting my hands on a hardcover copy of the book that included illustrations by Ted Nasmith..


 and this one also had the map of Beleriand at the back...

 So, to start things off, it is tearing the book apart by removing the block of text from the hardcover pieces...

 I went thru and cleaned it all up so that we don't end up with any unnecessary pieces...

 To begin constructing, i went on to make a template of the design from cardboard. In this case the cover would feature an abstraction of the two trees of valinor (gold and silver trees)under a pointed arch.
 cut only on of the trees since i could flip it and use it for the tree on the right...

 First thing to add to the book was its leather spine and ribs...For this one we went with a dark brown leather. I don't have images for these steps but I used craft foam to build up the ribs and then glued the faux leather over the spine...
 glued the tabs in...
 For the design of this book the fabric for the spine would go under the faux leather to be used for the covers...
 Using the cardboard template I started carefully cutting out the pieces out of an aluminum sheet...The aluminum sheet did have a slight gloss finish so i went on to sand each piece to give the metal more of a brushed look...

 Once i had all the pieces cut up and sanded they were ready to be assembled! To get these in the right position i taped the original cardboard stencil to a cutting mat and began gluing the pieces to each other from the back...
 I markered in where the crazy glue would go so i wouldn't add any excess glue...Used the grid of the cutting mat to place the other tree in a symmetrical position....
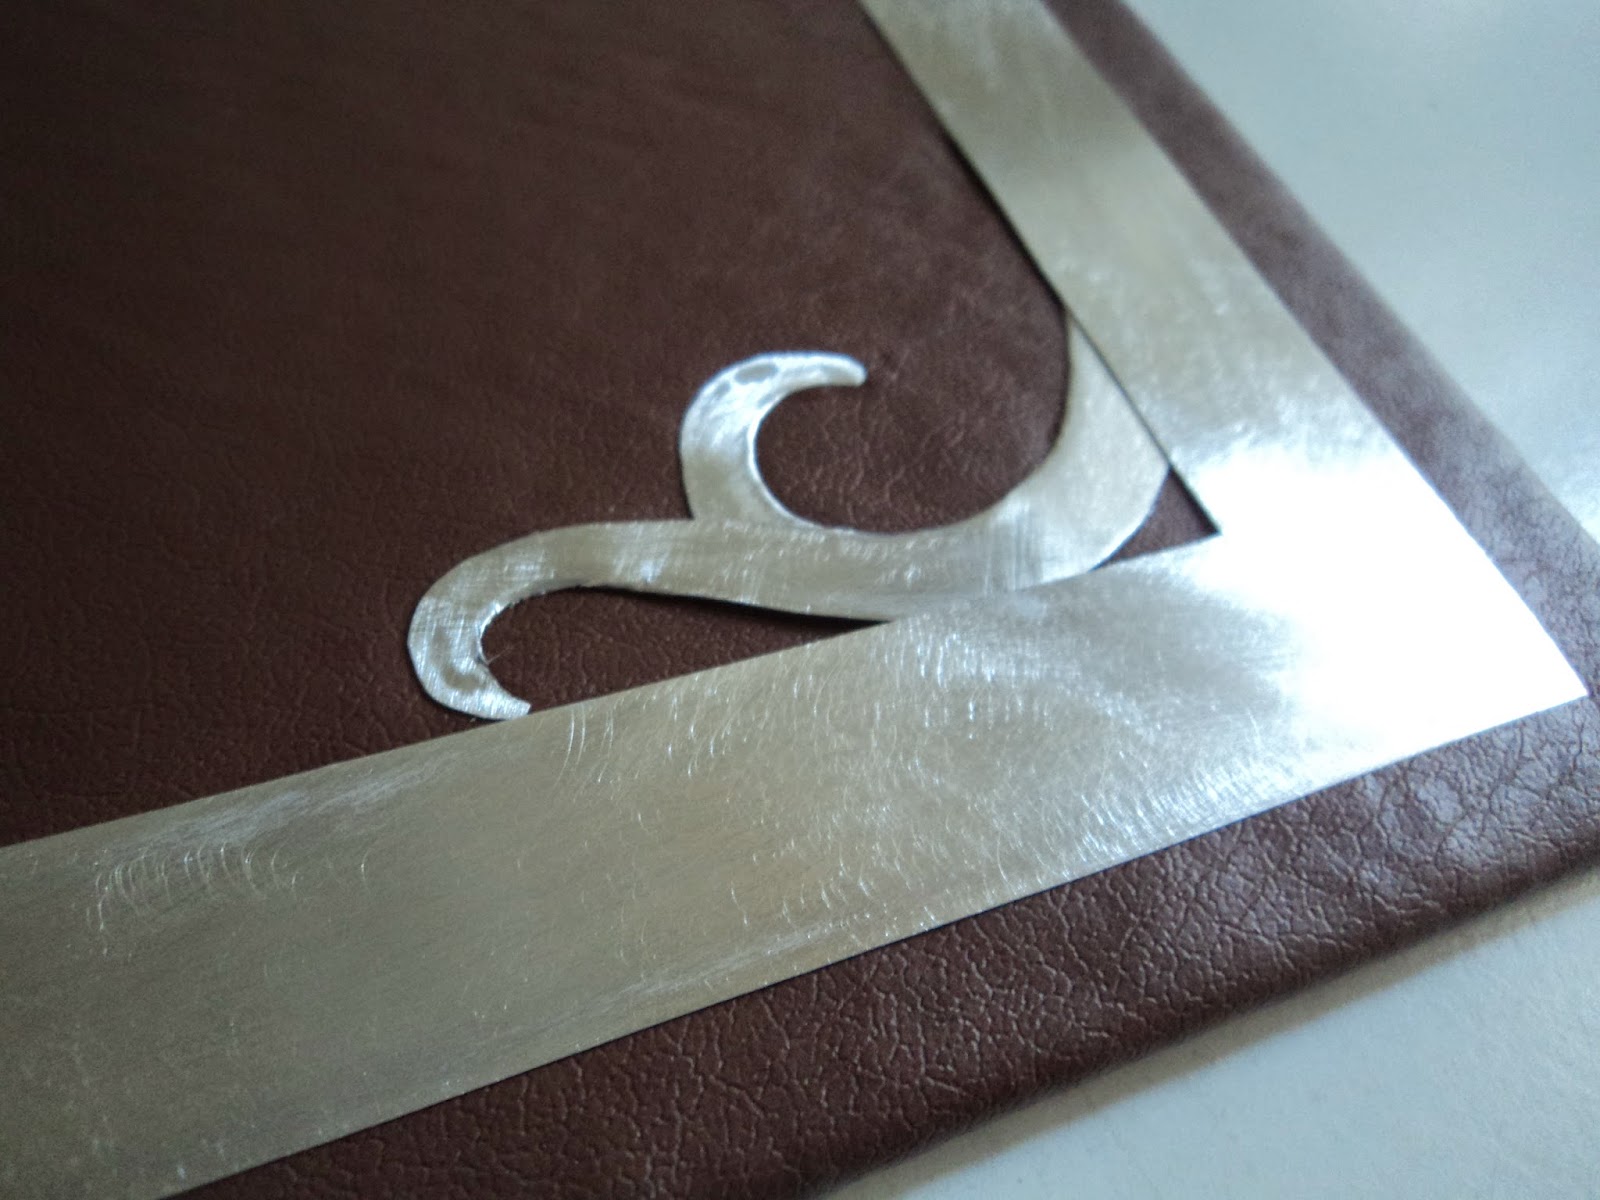
 The back cover would also have an aluminum stencil but it would only be the frame with the pointed arch....
 Next came getting the covers ready for the addition of the metal stencils...For this, we went with a light brown faux leather. The edge that would overlap the spine fabric was folded in and glued over as seen in the image below.
 Once dry, the corners were cut and the tabs were folded inside and glued in place...


 And it was time to glue on the metal stencils!

 The crazy glue did bond the metal and fabric pretty well so i decided to leave the branches clean and without the addition of small nails to hold it down...
 Although they weren't needed, i later added some silver tacks to the four corners because they made the corners look so much lovelier!
Next came preparing the text block. I started by gluing a black thin cheese cloth fabric to the spine and then adding a layer of brown butcher paper to give it more strength. (text block was pretty heavy)

 With the text block in place i went on to glue the two layers down against the cover pieces...and then the finishing touches!
 For the center of the front cover a brass upholstery nail was added to represent the sun/golden tree and right behind it a slightly larger aluminum circle to represent the silver/moon...
 And as for the inner lining for the front and back...that was reserved for ted nasmiths The Shores of Valinor!

 Up on the next post you can see the final images of this book nicely staged!


Comments
Post a Comment