The Hobbit: Re-cover 1
So i've been working on a recover for The Hobbit book as a commission. First time doing a recover so it's bound to be exciting!
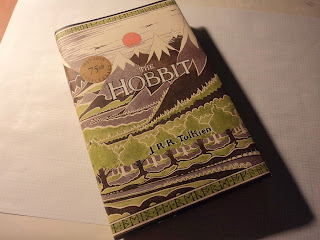 For this guy i went with the 75th edition of the hobbit which contained both color and black and white illustrations.

 At the front you can find the map of thorin and at the back, the map of wilderland.
 Since these maps would not end up peeling off nicely i opted to find online, print, and stain the maps to replace the two in the books.
 Now the recover started off by getting its old world spine ridges (i wonder what they are actually called?). These were done with craft foam pieces that were then glued to the spine before the text block was cut off.
 Due to the design of the covers the edges of both front and back covers would stay exposed so these needed a slight texture to go with. The napkins you see below provide just the right textures!
 Glued the napkins on with a mixture of diluted white glue and black acrylics.
 Next came the faux black leather for the spine.
 Glued the faux leather on and held it down using string as you see below.
 Once the string was removed the old world spine ridges were nicely pronounced.
 With the spine done, the time came to remove the text block. I'll admit i felt a bit like a savage ripping the book apart.

 Now that the text block was removed i proceeded to paint the edges of the covers with variations of gold, white, and black acrylics
 The inside of the covers was also given a coat of acrylic to cover the maps and avoid them from showing thru the paper lining that would later be glued on.
 "Bolted" down to the covers would be a piece of basswood with the design from bilbos journal in the LOTR films on it. The design was transferred over in pencil...
 And then given depth using a wood burner....
 Basswood was then weathered by carving bits of wood of and then stained using a mixture of coffee and acrylics to the desired color.

 at the spine thinner pieces were added as seen above and below. these pieces had slits at the edge that allowed the tacks to fasten. I opted for not having the tacks closest to the spine to pierce thru in case the tacks caused the covers to not close nicely ...
 Corner tacks did pierce thru...Glued on the basswood pieces...

 Folded in and glued the tabs of the faux leather...
 And now we can finally see the cover coming together!
 To the text block, i glued on a paper, which is the one you see ripped below... This piece fastened the text block to the cover...It was ripped off at the edges to get rid of crisp edges that might be seen/felt once the other paper lining is glued down...
 Wood ended up needing a bit more color to it...
 Used masking tape to mask everything except the wood pieces and then gave the covers a couple of sprays of a glossy sealant...This gave the wood a slight sheen to it.
 And its ready for the page additions!
 The maps were printed with a laser printer so that the diluted coffee dye mix wont make the colors run (it does if its printed in inkjet). These pages have variations in brown and slightly blackened spots here and there...
 To the other two pages i gave them a two line border alike the ones on the maps...
 First i glued in the blank border pages in and then the map pages...from the image below you can see i left a tab of the old map page since cutting it off would definitely weaken the attachment of the text blocks, first and last pages. The first and last pages were a bit glued to the map pages...
 before the maps were glued in i went on to give them a couple of folds, tears, and wrinkles here and there...
 And The Hobbit recover was then ready for staging!


Hello. I am the recipient of this gorgeous gift. I just opened it and I am utterly enchanted by it. The book is marvelous craftsmanship. Thank you so much for working with my daughter to get this project done. The book will be a treasured item in our family for a very long time.
ReplyDeleteThanks for the comment! It was a great project to work on and it was also a great opportunity to lean something new. Im glad you liked it!
Delete